What is a Pinhole Projector? A Comprehensive Guide on Its Principle And Use
Introduction
Welcome to our comprehensive guide on pinhole projectors. In our increasingly digital age, it's exciting to look back at simple, analogue technologies that have stood the test of time. A pinhole projector is one such device - a simple contraption that has intrigued curious minds for centuries. In this article, we will uncover what a pinhole projector is, the underlying principles behind this fascinating piece of technology, and its uses. We will also guide you through constructing your own pinhole projector and explain the principles behind it in a way even children can understand.
What Is a Pinhole Projector and Its Principle?
A pinhole projector, an intriguing piece of technology, can be defined and understood in these three key aspects:
1. Conceptual Understanding: A pinhole projector is a simple yet engrossing tool that projects an upside-down image of a scene before it. A straightforward mechanism makes it possible for this apparatus to operate without the need for any electrical or digital system.
2. The Principle: The operation of a pinhole projector is governed by principles of light transformation and inversion. Essentially, the projector takes in rays of light and manipulates them to generate an image on a flat surface.
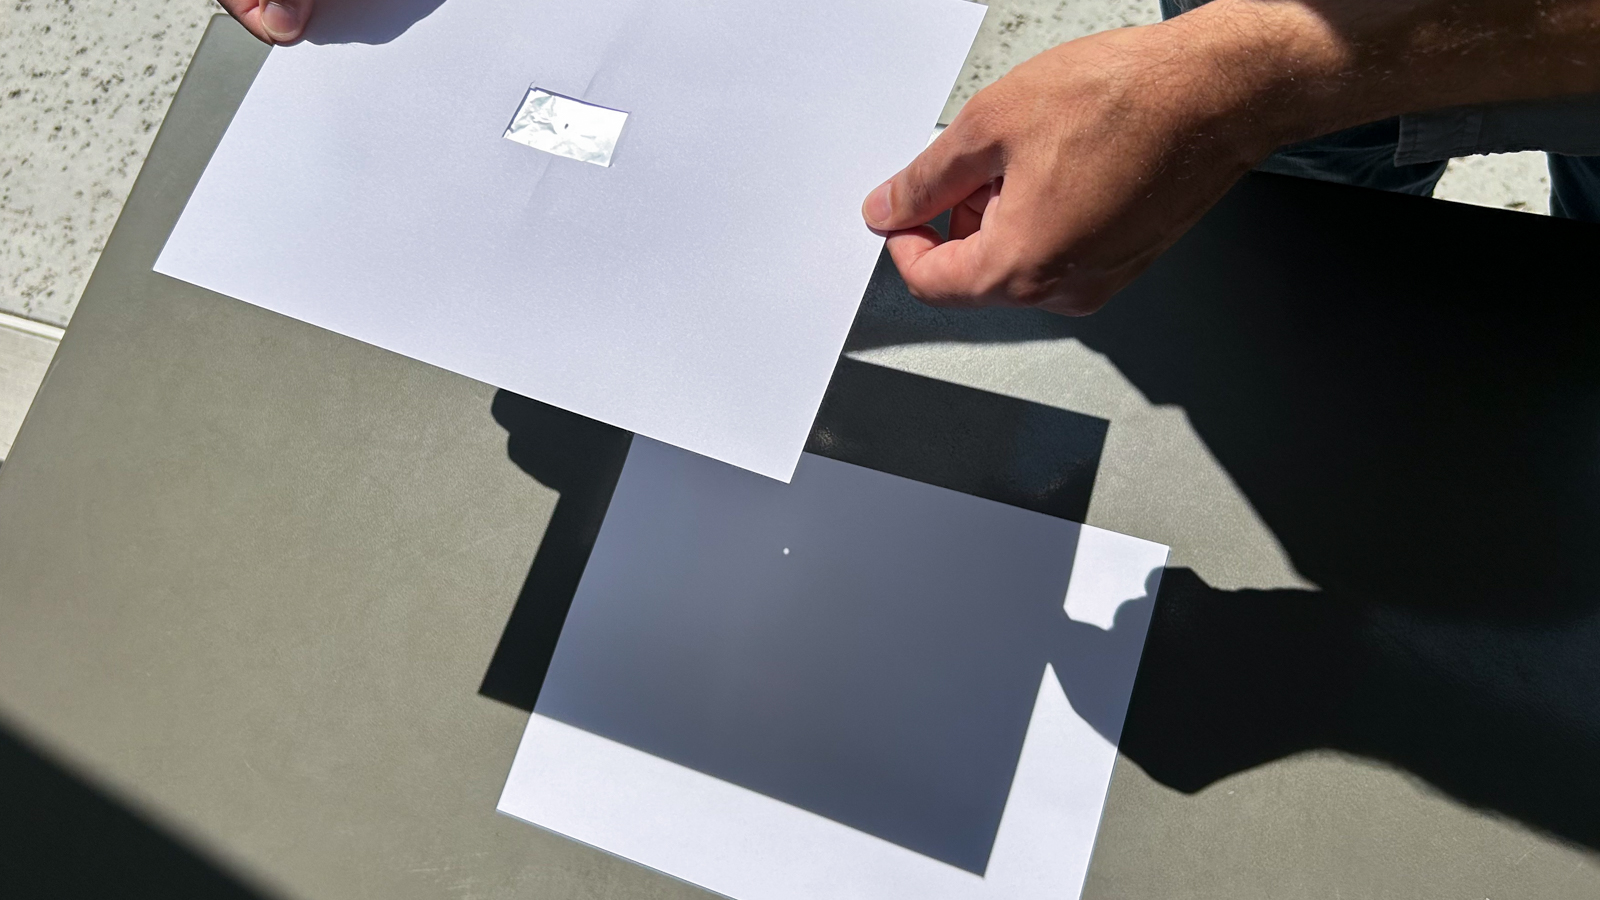
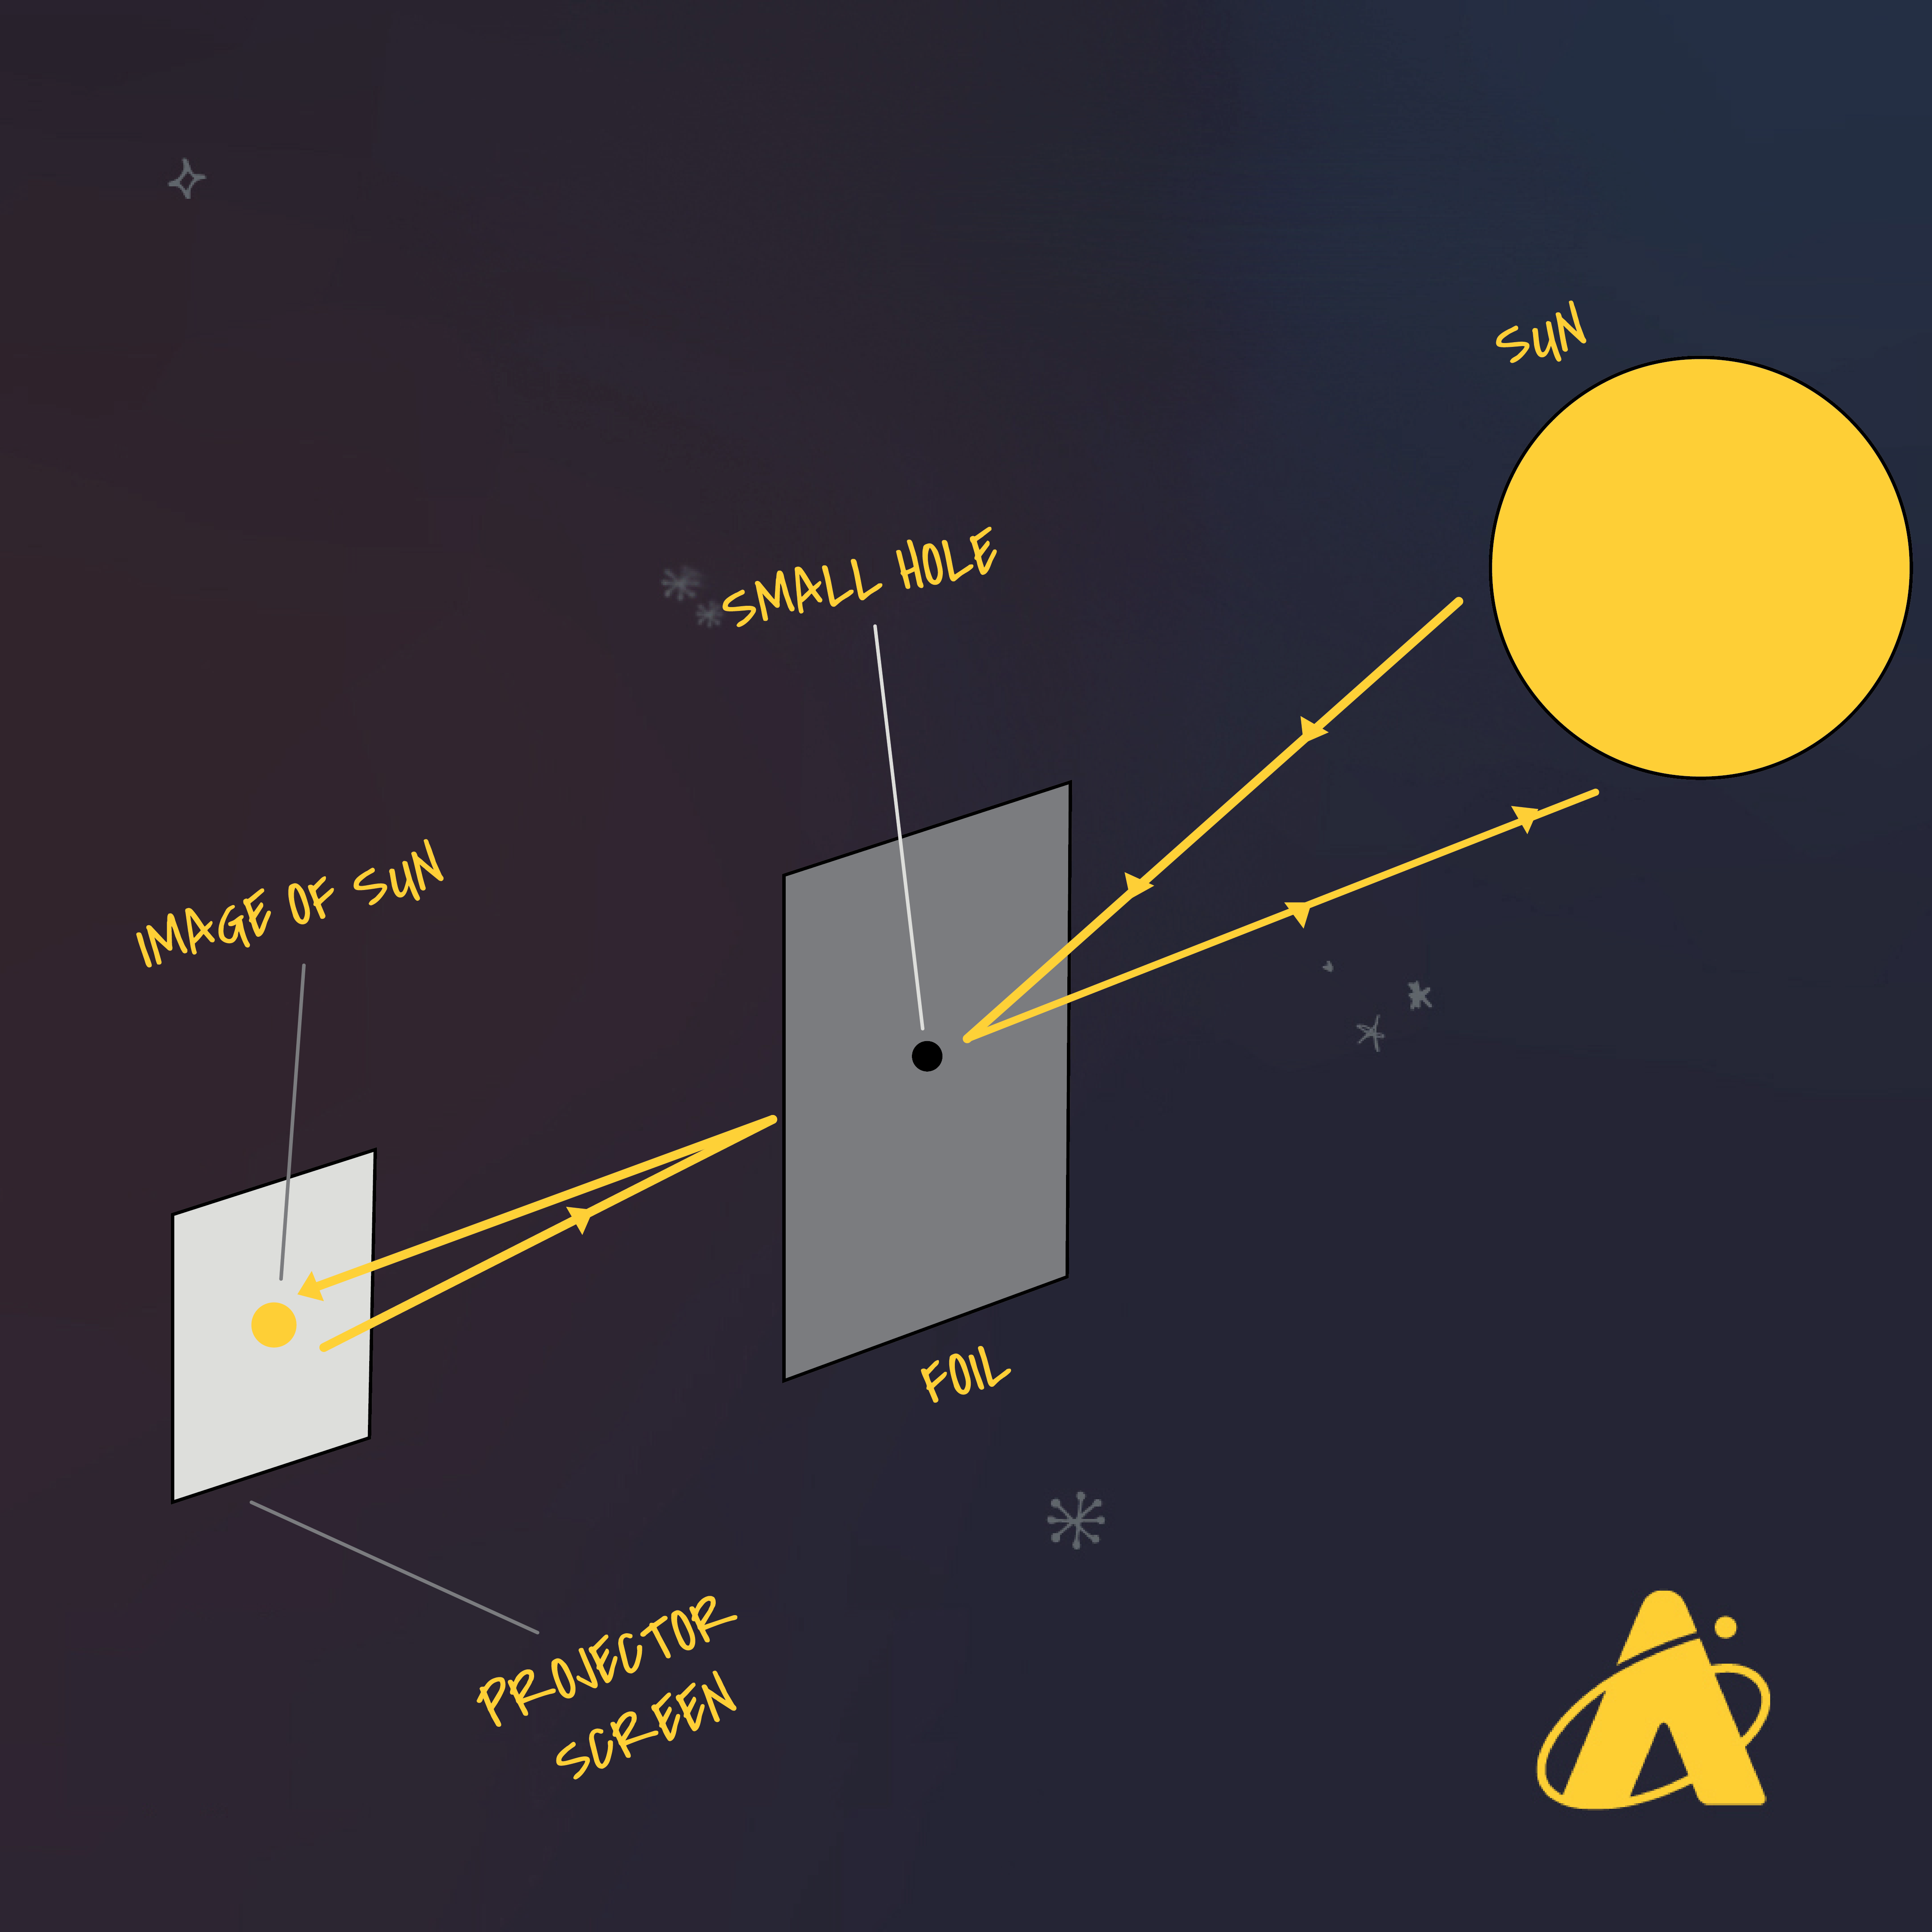
3. The Process: The projector works by allowing light from an object to pass through a minuscule hole, typically the size of a pin, onto a tableau within a darkened environment. This operation results in the formation of an inverted image of the object being observed. The pinhole acts as a lens in this arrangement, focusing the light rays to cast an image.
Simply put, a pinhole projector can be viewed as a basic model of a camera, where the pinhole serves as the lens and the focusing mechanism, allowing users to shoot and project inverted images.
Understanding the Underlying Science Behind Pinhole Projectors
Pinhole projectors are devices operating on the fundamental laws of light and optics. Deep dive into the underlying science of these intricate devices involved in a captivating play of light and images:
• Straight-Line Propagation of Light: The basic function of the pinhole projector hinges on this principle. Light travels in a straight line from its source. This principle ensures that when light rays from an object are directed towards the pinhole, it travels forward in a single straight path to the opposite side of the box.
• The Pinhole as the Lens: The minute hole acts like a camera lens. When light passes through, it gets restricted to a confined pathway, leading to a clear projection on the other side.
• Light Restriction and Focused Image Creation: As light enters through the tiny hole, its pathway gets narrowed down, forcing the light rays to form a light cone. The tip of this cone is where the light rays converge to create a sharp, upside-down image on the other side.
• Image Inversion: The image seen on the other side of the projector is inverted due to the crossing of light rays as it enters the pinhole. This is why the image appears to be upside down and back to front.
Not only does understanding these principles add to your knowledge, but it also enhances your experience with the pinhole projector, making it more than a mere science experiment.
How Are Pinhole Projectors Constructed?
Creating a pinhole projector can be an enjoyable hands-on project that brings together scientific and creative skills. Here's a straightforward step-by-step guide on how to build this fascinating device:
Materials Needed:
* A box
* Aluminum foil
* A pin
* White paper (to use as a screen)
* Tape
Steps to Construct a Pinhole Projector:
1. Prepare the Box: Choose a box suitable for your projector, this could be a shoe box or a cereal box. The larger the box, the bigger the projected image will be.
2. Cut a Hole: On one end of your chosen box, cut a small square hole (about 2x2 inches should do).
3. Cover with Foil: Attach a piece of aluminum foil over the hole you've just cut out. Make sure it's taped down securely to prevent light leakage.
4. Create the Pinhole: With the pin, puncture a small hole in the center of the foil. This will serve as your “camera lens”.
5. Install the Screen: On the inside of the opposite end of the box from where you made your hole, attach a white piece of paper. This is where your image will project.
6. Seal the Box: Close the box and ensure that the only light entering the box comes through the pinhole. Any additional light can distort your projected image.
Now, your pinhole projector is ready for use. Remember, the clarity and size of the image can be modified by adjusting the distance between the pinhole and the paper screen. Have fun experimenting!
How to Use a Pinhole Projector Safely?
Operating a pinhole projector is a secure and exciting way to witness various solar phenomena, particularly when you don't have access to specialized glasses or equipment. However, safety should always be a priority when using any device, especially those associated with sun observation. Please note that the pinhole projector is for projection purposes only and not for direct viewing.
For the safe use of a pinhole projector, follow these precautions:
- Never Look Directly at the Sun: Even while using a pinhole projector, one must adhere to this universal rule. Looking directly at the sun can cause severe eye damage, often irreversible.
- Solar Observation: To view events like a solar eclipse with your pinhole projector, aim the pinhole towards the sun. However, keep your sight on the projected image on the screen inside the box, not at the sun itself.
- Usage By Children: If your children are involved in using a pinhole projector, make sure they understand the importance of pivotal visual safety factors. Never leave them unsupervised during the procedure.
- Distance Adjustment: Adjust the distance between the pinhole and the screen to find the clearest and safest viewpoint for observation.
By adhering to these guidelines, you can ensure a safe yet thrilling solar observation experience with your pinhole projector. Always remember that the primary purpose of this device is projection rather than direct observation. This simple yet essential rule can protect your vision while you delve into the wonders of the sky with your pinhole projector.
How to Explain the Science of Pinhole Projectors to Kids?
Teaching children about the science behind pinhole projectors can be both stimulating and hands-on. Here's a step-by-step guide on how to simplify this intriguing optical phenomenon for young learners.
Step 1: Constructing a Pinhole Projector
- Gather your materials: a shoebox, aluminum foil, a pin, tape, and a piece of white paper.
- Cut a small hole on one end of the box and cover it with the aluminum foil.
- Use the pin to create a tiny hole in the aluminum foil.

- Attach the white paper on the inside of the opposite end of the box to function as the screen.
Step 2: Visualizing the Science of Light
- Illuminate a fun fact: Inform them that light travels in straight lines.
- Introduce the function of the pinhole: The tiny hole serves as the lens, focusing the light rays to create an image, much like our eyes or a camera does.

Step 3: Demonstrating the Principle of a Pinhole Projector
- Guide them to point the pinhole end of the shoebox towards a bright scene or object.
- Let them observe the inverted image projected on the screen inside the box.
- Enhance the learning: Encourage them to experiment by adjusting the distance between the pinhole and the screen to see the changes in the image's clarity and size.
Using this hands-on approach will not only clarify the principles of light and projection for kids but also make science fun and engaging.
Conclusion
A pinhole projector is a fascinating, timeless device that demonstrates the basic principles of optics in an engaging and tactile way. Whether it's for viewing an eclipse, teaching children about light, or simply satisfying your own curiosity, a pinhole projector is an invaluable tool. We hope this guide has given you a clearer understanding of what a pinhole projector is and how it operates.
Related FAQs about what is a pinhole projector
What are some of the historical uses of pinhole projectors?
Historically, pinhole projectors or 'Camera Obscura' were used by artists for drawing and painting assistance, as they provide an accurate outline of the subject. Astronomers often used them to study the sun and its eclipses safely. They were also used for entertainment, predating the invention of modern cinema.
How do pinhole projectors help in letting us view natural phenomena safely?
Pinhole projectors allow safe observation of solar events, like solar eclipses. They project the event onto a screen, allowing observers to see the event indirectly, protecting their eyes from the sun's harmful rays. However, it's important to remember that the pinhole projector is for projection viewing, not direct viewing.
Can one make a pinhole projector at home, and if so, how?
Yes, one can construct a pinhole projector at home using simple household materials. You would need a box, aluminum foil, a pin, tape, and white paper. Cut a hole in the box, cover it with foil, and make a small hole in the foil. Install the paper inside the box opposite to the foil as a screen.


